First Steps with the XRP Ledger: Setting Up Your Xaman Wallet on Testnet
Create and fund an XRP Ledger Testnet account, import it into the Xaman wallet on your phone, switch Xaman to the Testnet, and send your first payment.
What you'll learn
- How to generate a funded XRP Ledger Testnet account and where to find its credentials.
- What the secret key is, and why you must never share it.
- How to import an existing account into the Xaman wallet on your smartphone.
- How to switch Xaman to the XRP Ledger Testnet using Developer Mode.
- How to send your first Testnet payment and confirm it on the public ledger explorer.
Overview
By the end of this module, you will have a real XRP Ledger account, funded and running in a mobile wallet, and you will have sent your first payment. Everything here happens on the Testnet, a full copy of the XRP Ledger used for learning and testing. Test XRP has no monetary value and is given away for free, so you can experiment without any risk. The steps, the wallet, and the experience are otherwise identical to the live network, so the habits you build here carry over directly. You will use Xaman, the most widely used XRP Ledger wallet, on your own smartphone.
Before you begin
You need two things:
- A smartphone (iOS or Android) where you can install an app.
- A computer or second browser tab to open the faucet page.
One idea to keep in mind throughout: an XRP Ledger account is controlled by a secret key, a value that starts with the letter s. Whoever holds that key controls the account. On the Testnet this is low-stakes, but treat it seriously now so the habit is second nature on the live network, where the same key would control real funds.
Step 1: Create your Testnet account
First you will generate a brand new account and have it funded automatically.
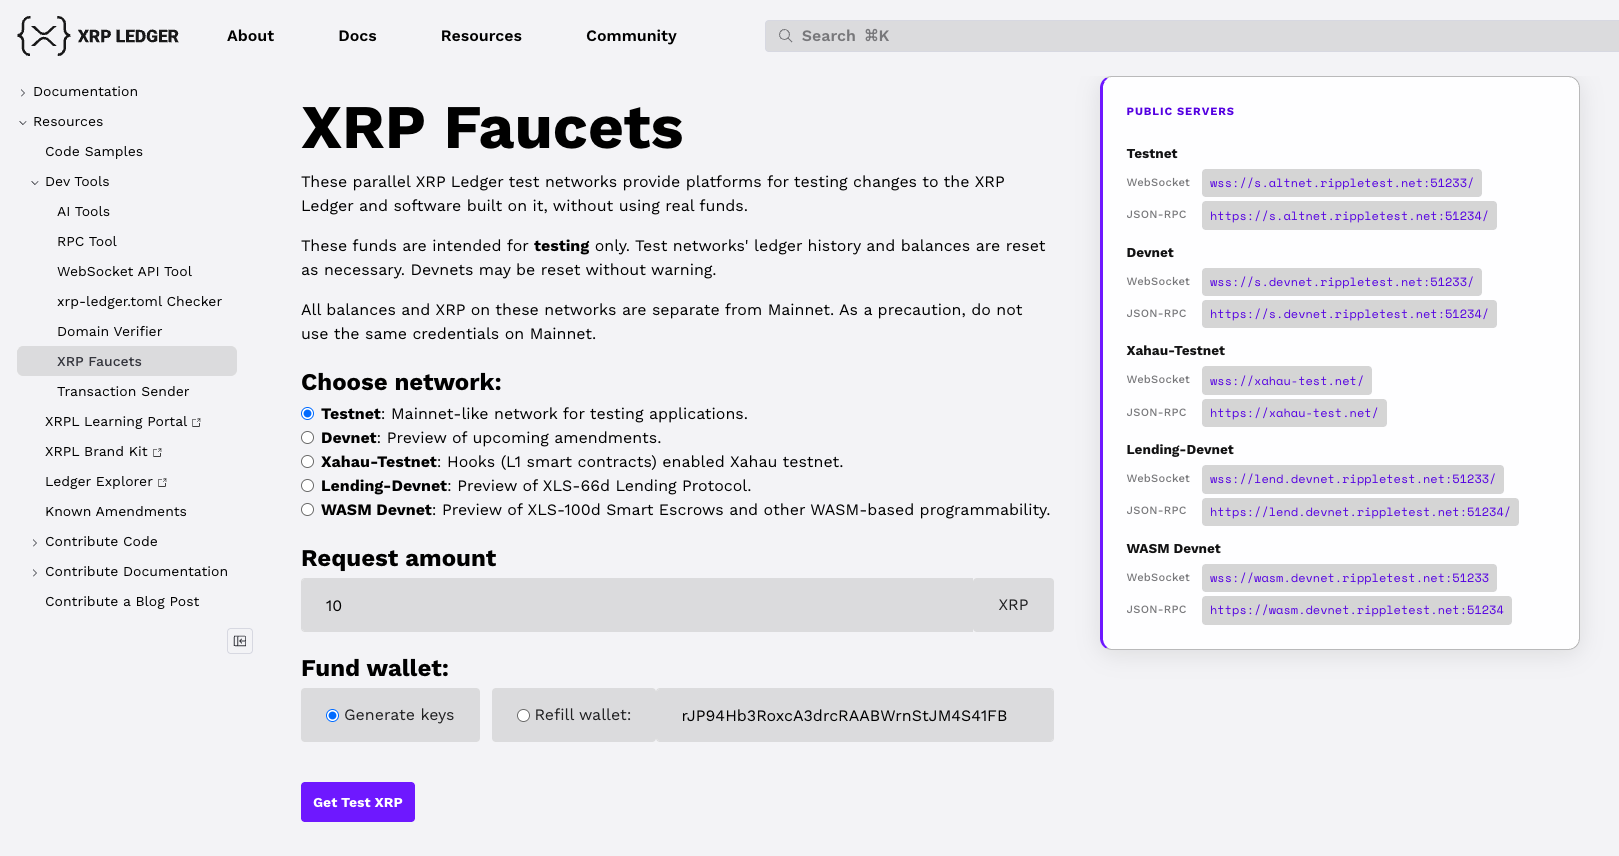
- Open the faucet page: xrpl.org/resources/dev-tools/xrp-faucets.
- Click Get Test XRP.
- Wait a few seconds while the network creates and funds the account.
- Copy the Secret Key, the value that starts with
s. You will paste it into Xaman in the next step.
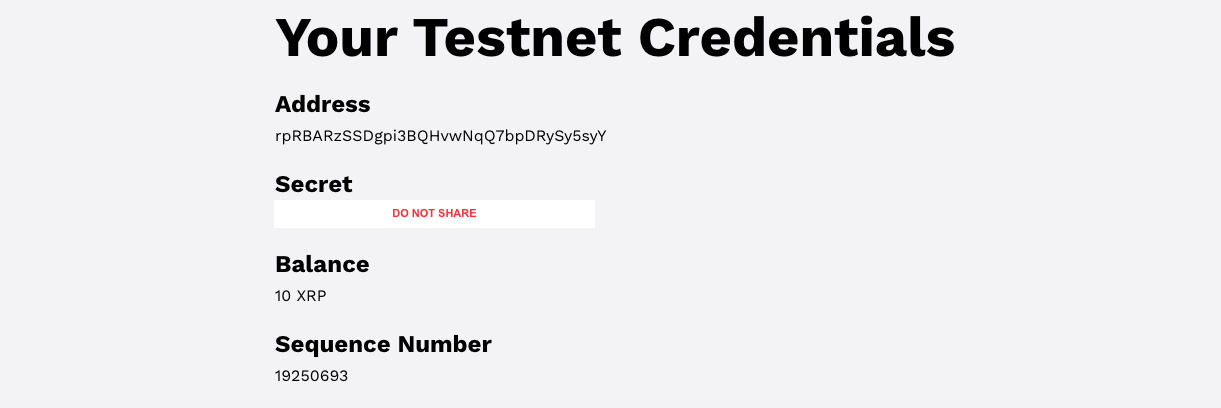
The page shows two important values. The address starts with r and is safe to share: it is how others send you payments, similar to an account number. The secret key starts with s and must stay private: it is the only thing needed to control the account. Never share your secret key with anyone.
The faucet also funds your new account with test XRP. Every XRP Ledger account must hold a small reserve of XRP to exist on the network, and the faucet provides far more than enough to cover that reserve and your first transactions.
Step 2: Import your account into Xaman
Now you will load that account into the wallet on your phone.
- Install Xaman from your phone's app store, or from xaman.app, and open it.
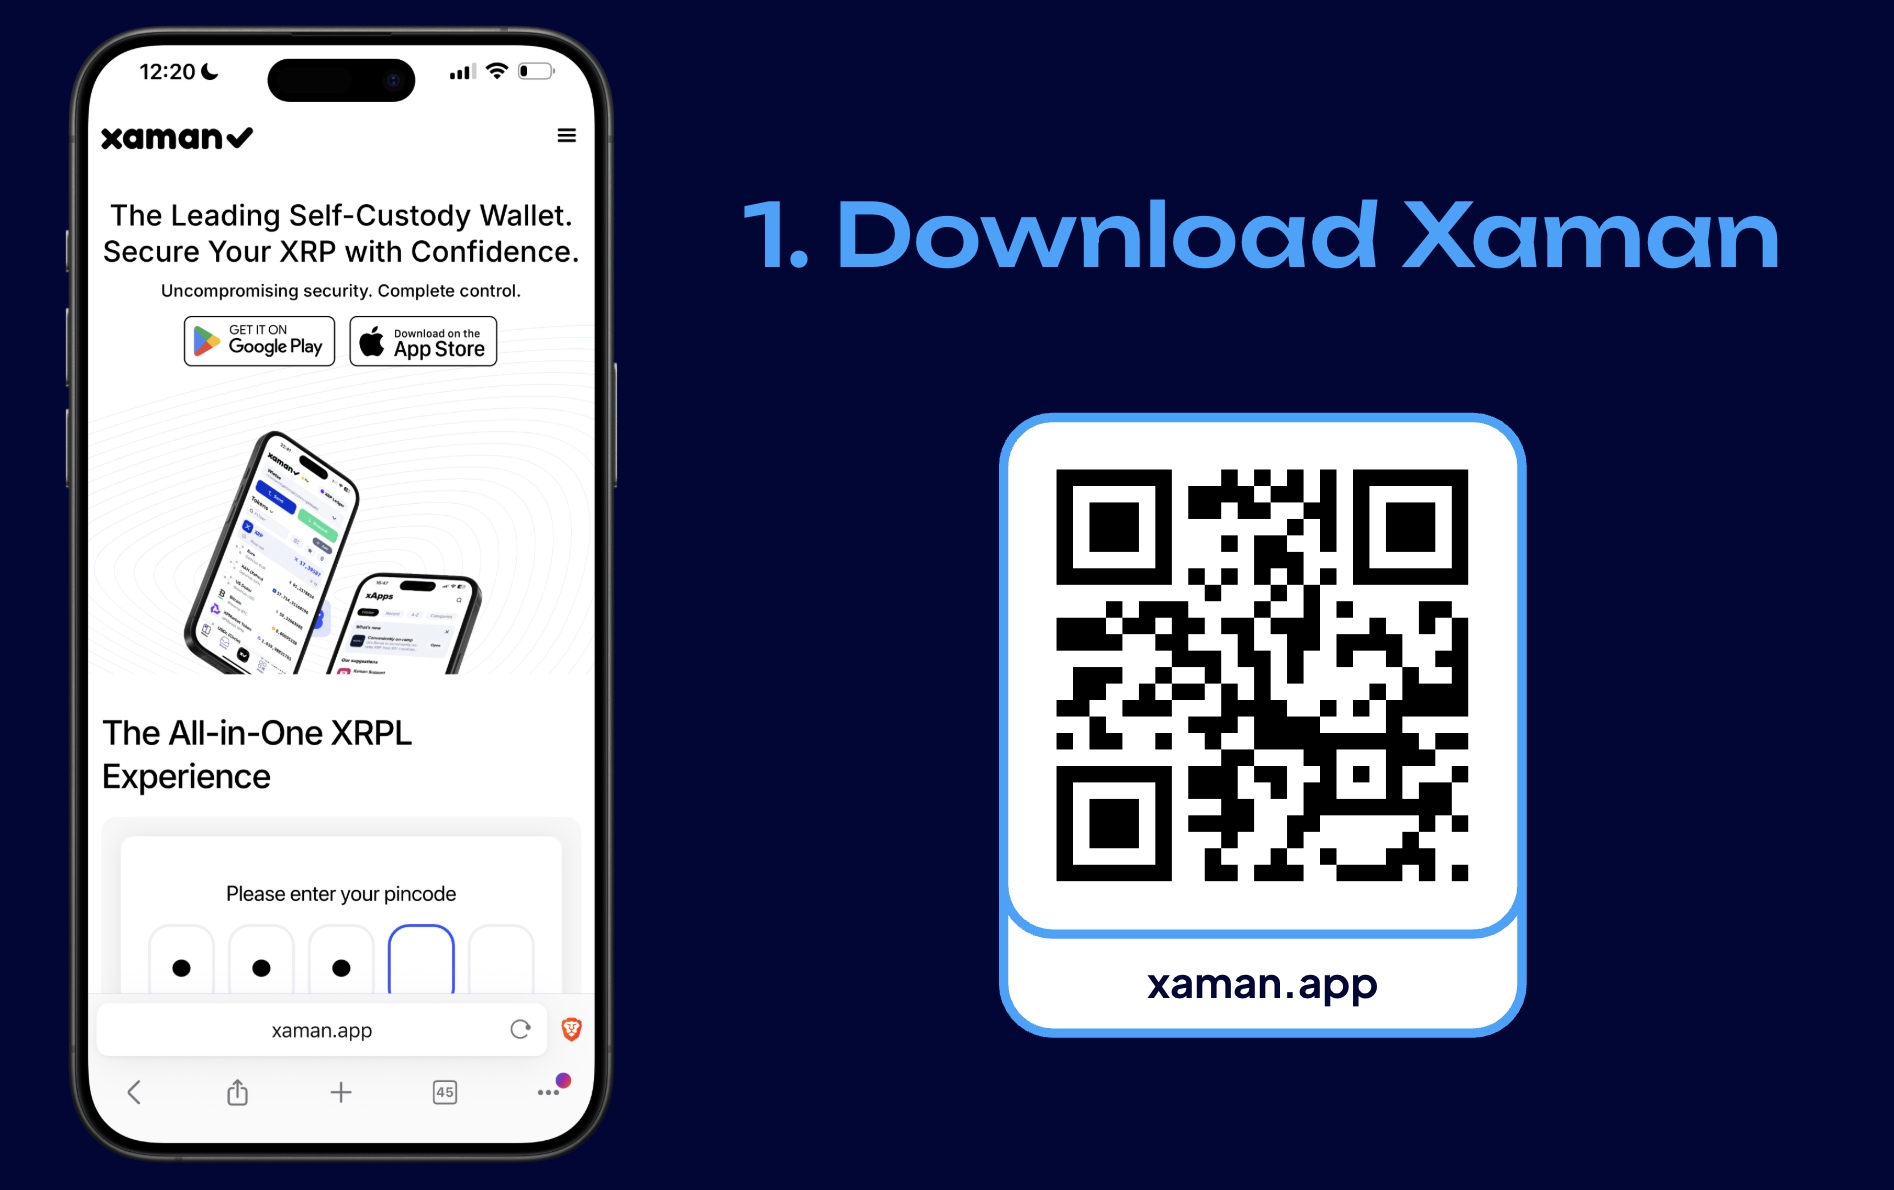
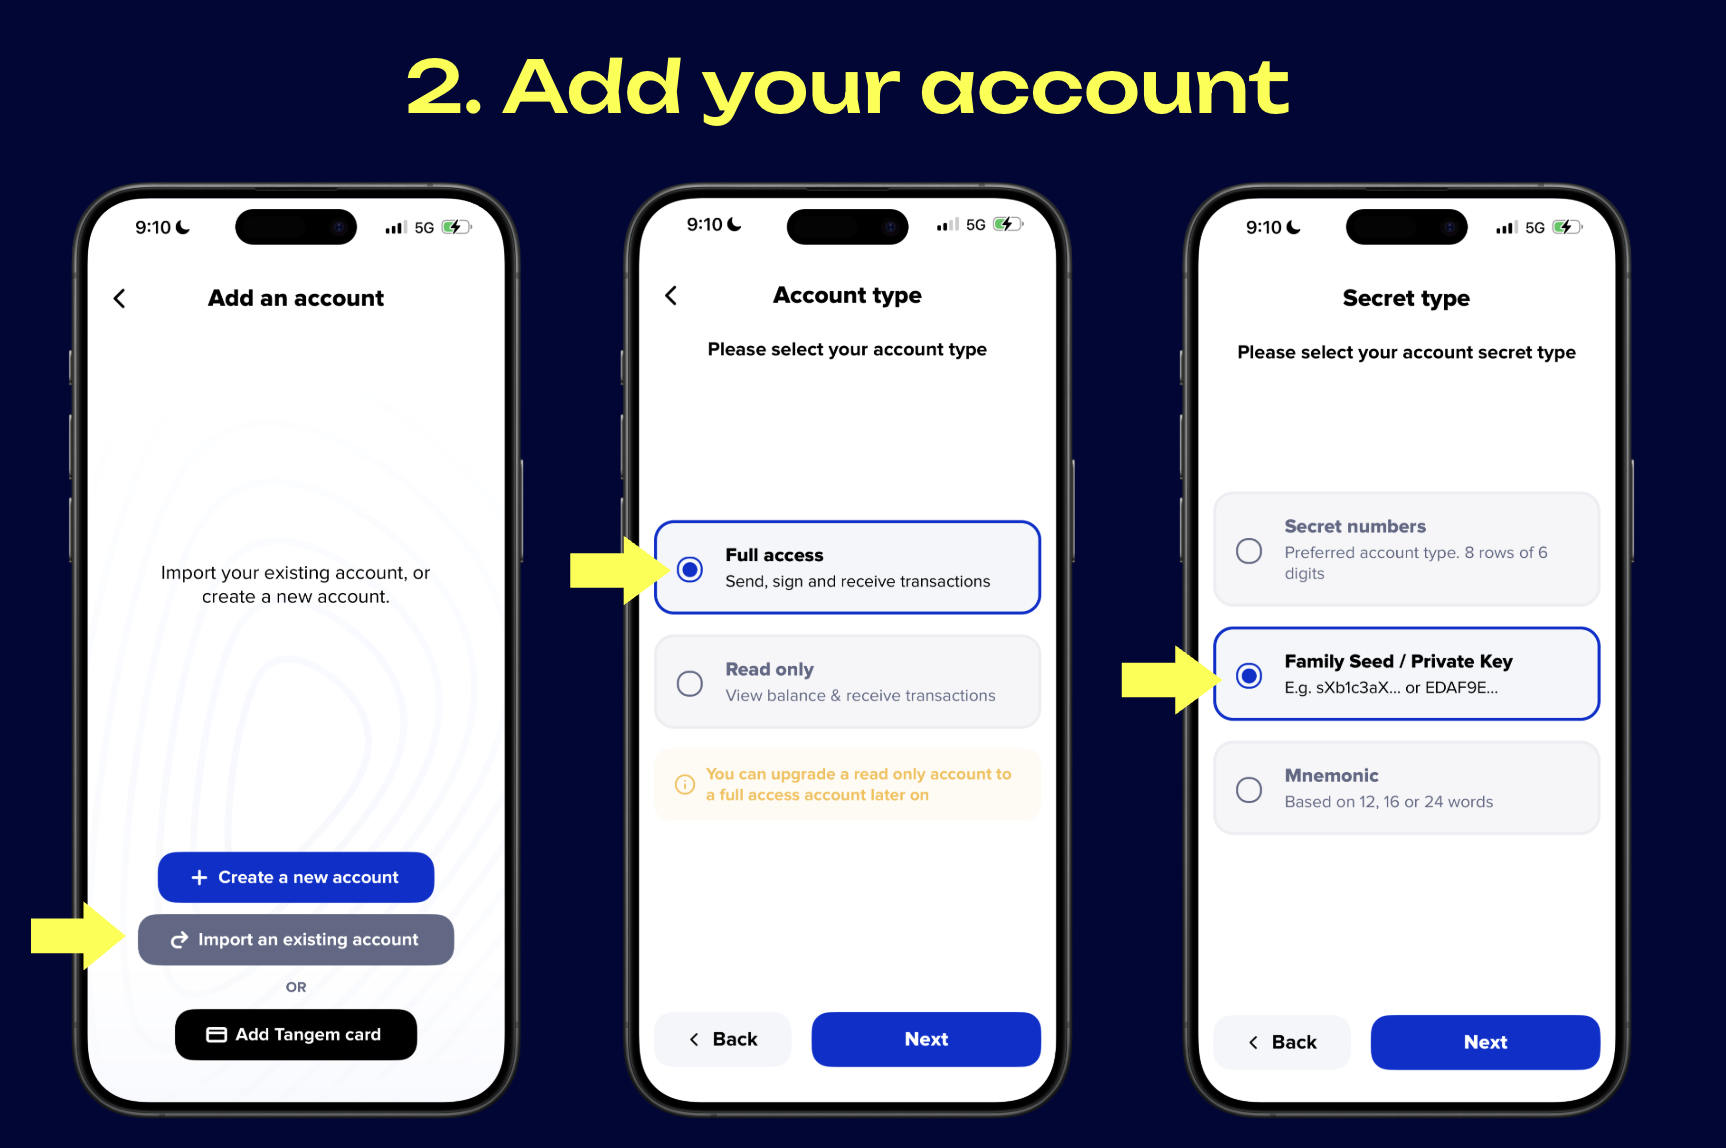
- Choose to import an existing account (rather than creating a new one).
- Select Full access, then Family Seed / Private Key.
- Paste the secret key (the
s...value) you copied from the faucet. - Give the account a name you will recognise, for example "UZH Testnet".
Xaman may ask you to set up a passcode or biometric lock for the app. Complete that step: it protects the keys stored on your device.
Step 3: Switch Xaman to the Testnet
By default Xaman connects to the live network. You need to point it at the Testnet, where your funded account lives.
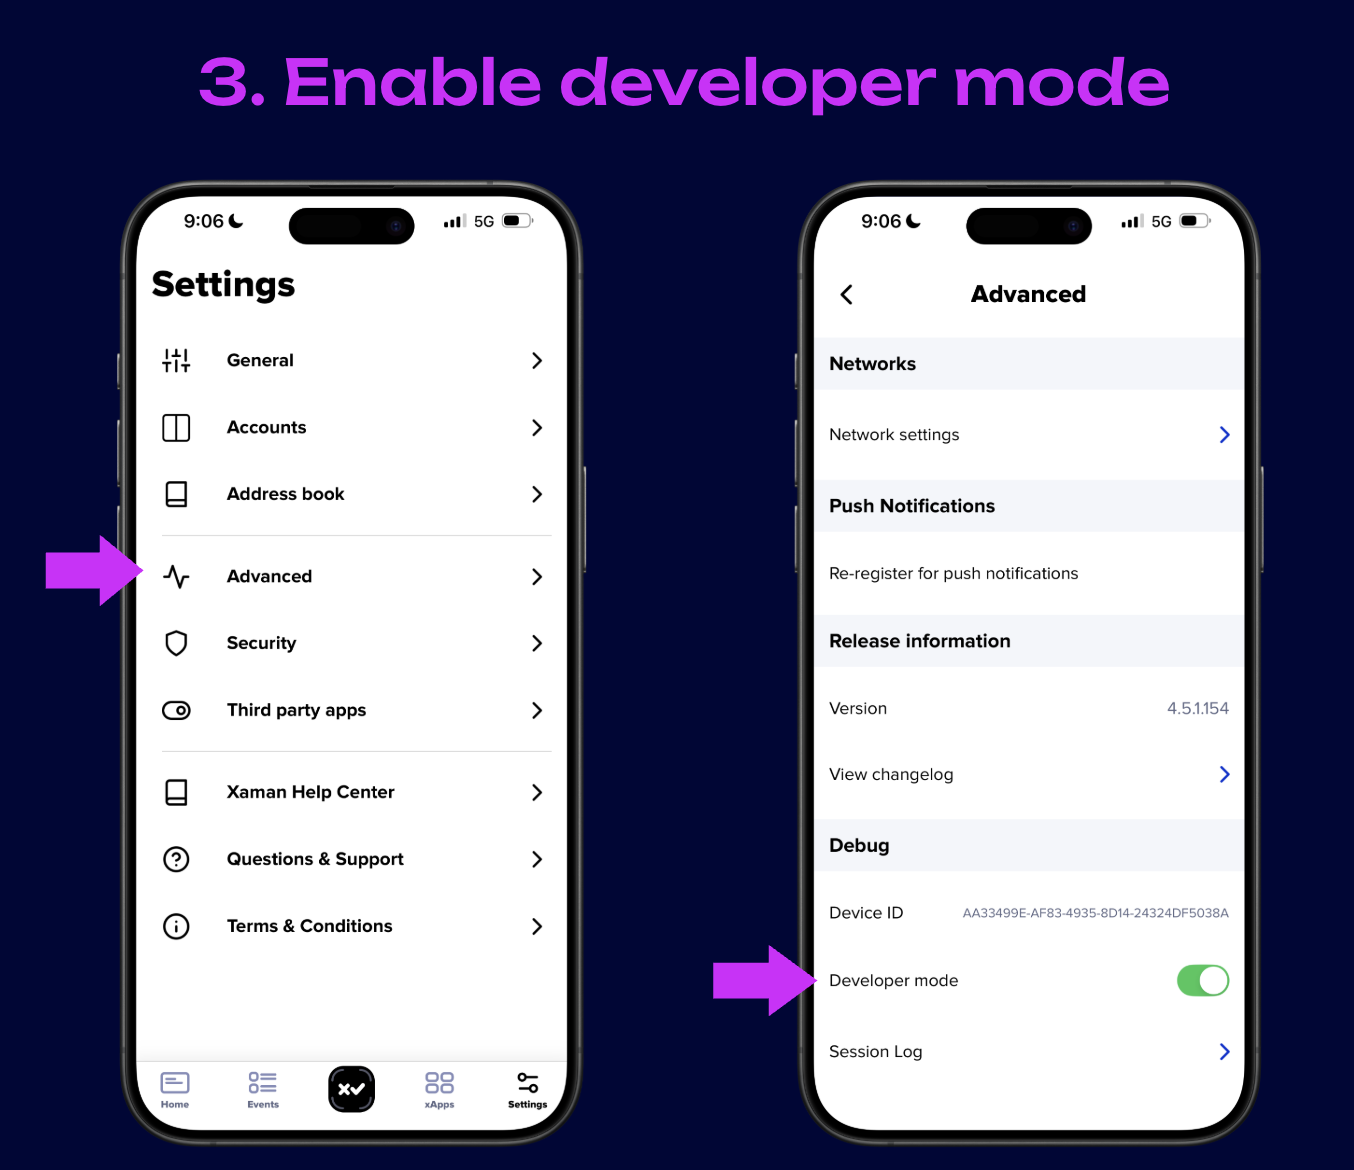
- Open Settings, then Advanced.
- Enable Developer Mode.
- Go back to the Home screen.
- Tap the network name shown at the top right, then select XRPL Testnet.
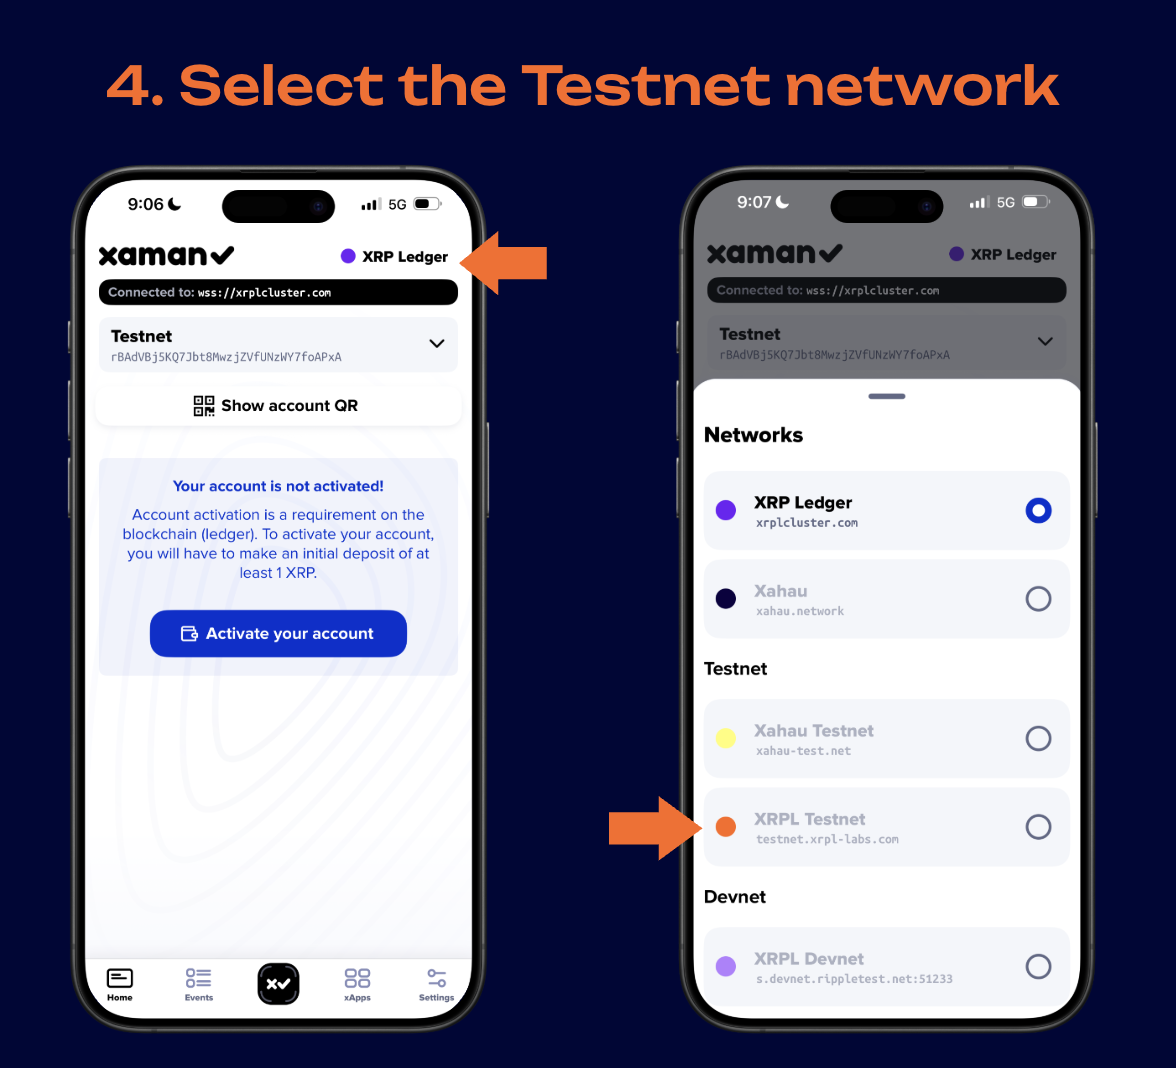
Your account balance should now appear in test XRP. If the balance shows zero, confirm that you selected the Testnet and that you imported the same account the faucet funded.
Step 4: Send your first payment
You are ready to make a transaction on a live ledger.
- Tap Send.
- Paste the receiver's address, the value that starts with
r. In class you can send to a classmate; on your own, generate a second account with the faucet and pay yourself between the two. - Enter an amount of test XRP to send.
- Slide to confirm. The payment settles in 3–5 seconds.
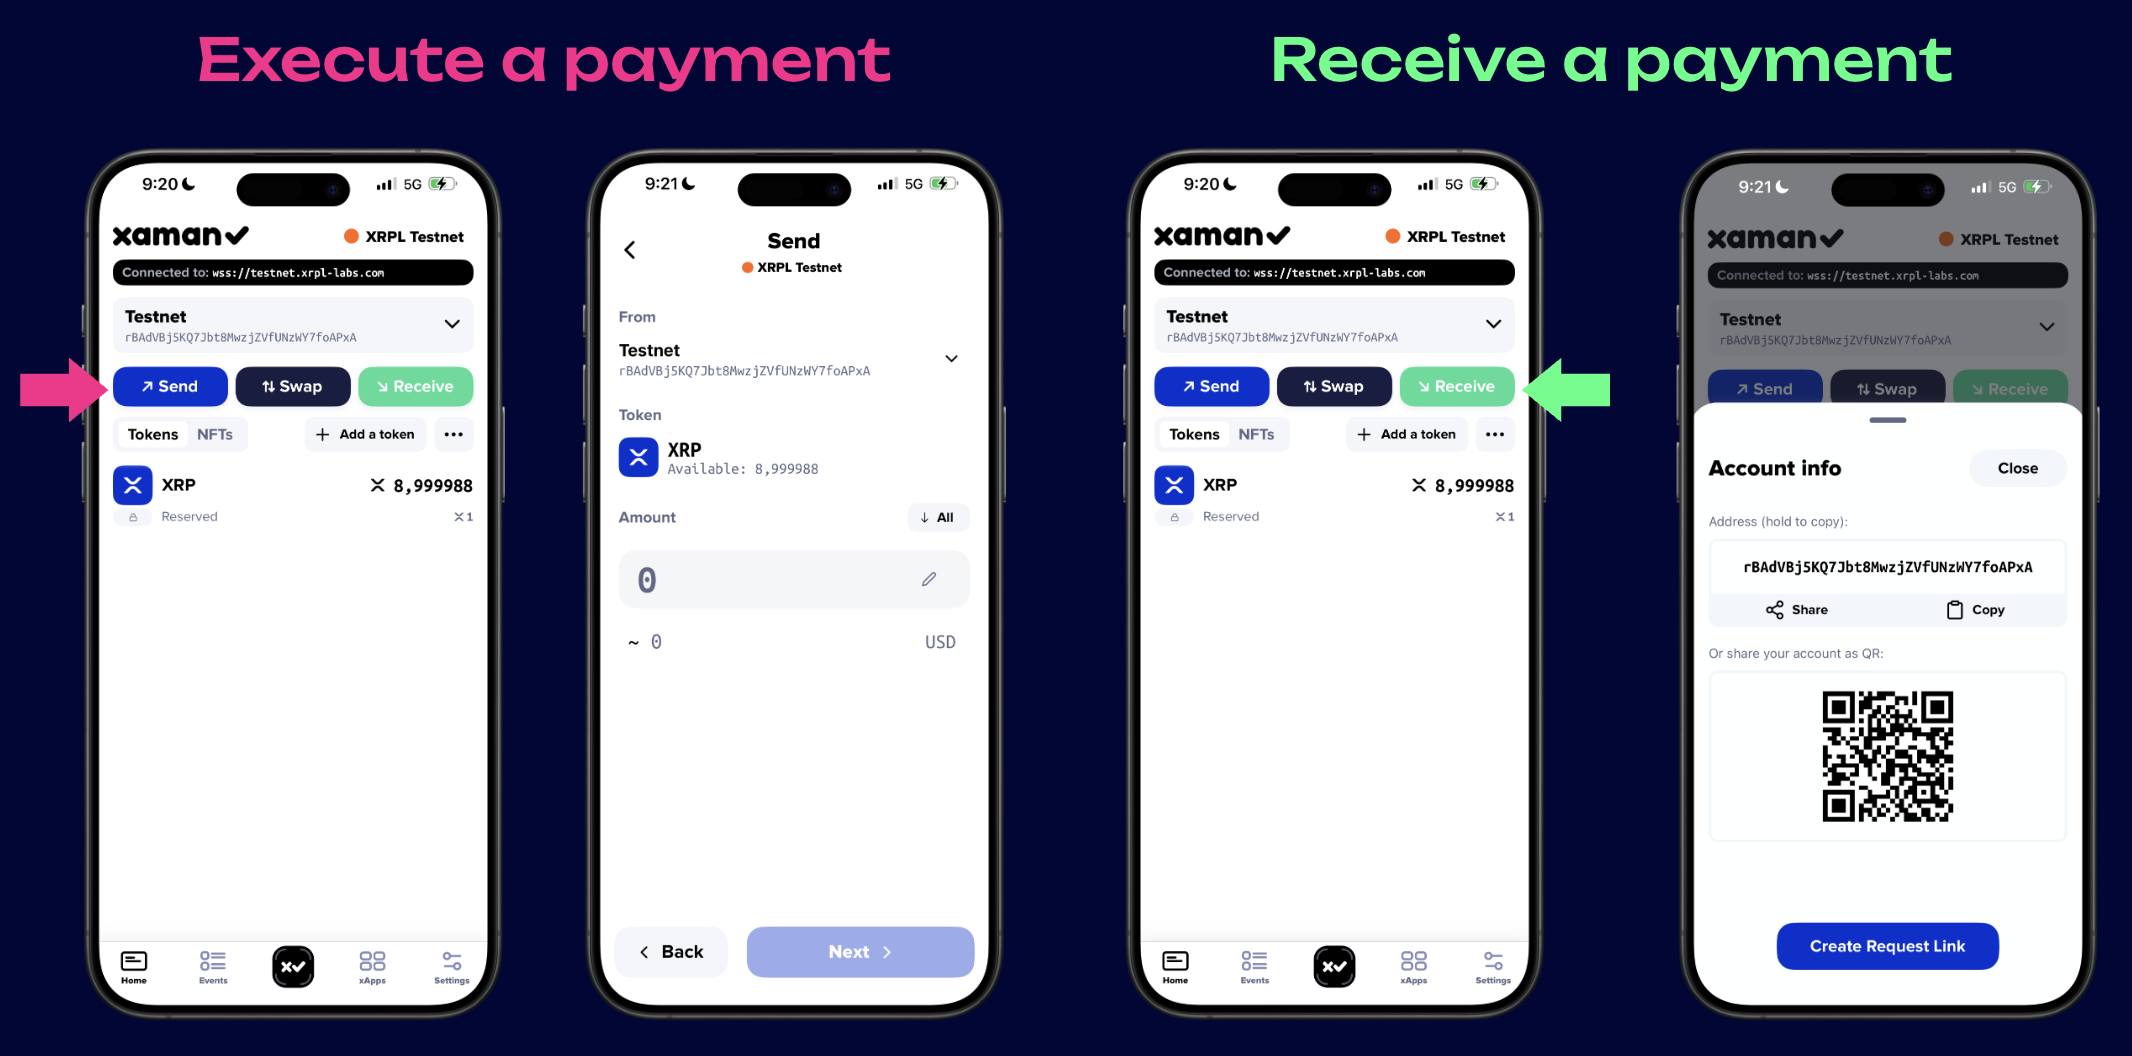
That is a real transaction on the XRP Ledger Testnet. To see it as the rest of the world does, open the Testnet explorer and search for your address or the transaction hash. You will find your payment recorded permanently, with its timestamp, amount, sender, and receiver. Keep that transaction link: it is the proof you complete this module with.
Check
You are ready for the session when:
- You have a funded Testnet account imported into Xaman.
- Xaman is switched to the XRP Ledger Testnet and shows your test XRP balance.
- You have sent your first Testnet payment and can open it on the Testnet explorer.
This transaction demonstrates every step above at once, since a settled payment could only exist if the account was created, funded, imported, and connected to the Testnet.
Resources
Assignments
0 of 1 complete